The average two-car garage has 400-600 square feet of floor space. In most homes, roughly half that space is occupied by things that aren’t cars — bikes piled in corners, holiday decorations stacked on top of paint cans, tools scattered across a plywood shelf, and at least three boxes of “stuff we’ll sort eventually” that have been sitting untouched since the last move. According to the US Department of Energy, 25% of homeowners with two-car garages can’t park even one car inside. That’s $30,000-$60,000 worth of vehicle sitting in the weather because $200-$500 worth of organization wasn’t done.
This isn’t about building a Pinterest-worthy garage with epoxy floors and matching cabinets (though we’ll touch on those). It’s about getting your garage from its current state — where you can’t find the 10mm socket and the Christmas lights are buried behind the power washer — to a state where everything has a place, the tools are accessible, and you can actually park inside.
The whole project takes a weekend. Saturday for sorting and purging, Sunday for installing the storage systems. Maybe $200-$500 depending on how much storage hardware you buy.
Key Takeaways
- Get everything off the floor. Walls and ceiling are your storage real estate. Every item on the floor is an item in your way.
- Purge before you organize. Most garages contain 30-40% of items that are broken, outdated, or will never be used again.
- Zone the space by activity. Workshop area, garden/yard tools, seasonal storage, sports equipment. Each zone gets its own wall or section.
- Wall-mounted systems beat freestanding shelves for most things. French cleats, slatwall panels, and pegboard put everything visible and accessible.
- Invest in one good workbench. It becomes the centre of your DIY life and makes every project easier.
Phase 1: The Saturday Purge
Pull everything out of the garage. Everything. Into the driveway, onto tarps on the lawn, wherever it fits. This is alarming and motivating in equal measure — the sheer volume of stuff that’s been accumulating is usually a shock.
Now sort into four piles:
Keep: Items you’ve used in the past 12 months, seasonal items with a specific purpose (holiday decorations, winter gear), and tools/supplies for active projects.
Sell/Donate: Functional items you no longer need. That exercise bike from 2022, the extra set of golf clubs, duplicate tools, outgrown kids’ equipment. Post big-ticket items on Facebook Marketplace or Craigslist. Donate the rest to Habitat for Humanity ReStore or Goodwill.
Trash/Recycle: Broken items, dried-out paint cans, rusted tools beyond restoration, mystery chemicals with no labels. For hazardous waste (old paint, solvents, motor oil, batteries), check your municipality’s hazardous waste disposal schedule — most areas have free drop-off events or permanent facilities.
Relocate: Items that don’t belong in the garage at all. Tax documents, family photos, valuable electronics, and anything moisture-sensitive should be inside the house in a closet, attic, or proper storage area.
Be honest during the purge. That belt sander you bought five years ago and used once? If you need one again, you’ll rent it for $25 rather than storing it for years. The paint from three houses ago in a colour you’ll never use again? Dispose of it. Dried-out paintbrushes? Trash. A set of drill bits and power tools you actually use? Definitely keep — and give them a dedicated home.
After purging, sweep or blow out the garage floor. This is also the time to assess the condition of the floor — cracks, stains, and drainage issues are easier to address with an empty garage.
Phase 2: Planning the Layout
Before installing anything, decide how the garage will be organized into zones. Stand in the empty garage and think about how you use the space.
The Zone System
Workshop Zone: One wall (preferably the back wall) dedicated to a workbench, tool storage, and project space. This is the most-used zone for most homeowners and deserves the best-lit, most accessible location.
Garden and Yard Zone: Rakes, shovels, leaf blower, lawn mower, bags of fertilizer and mulch, garden hose. Usually along one side wall, near the door that accesses the yard.
Seasonal Storage Zone: Holiday decorations, winter coats and boots, camping gear, seasonal sports equipment. These are used once or twice a year and should go in the hardest-to-reach locations — overhead ceiling storage, high shelves, or the back corners.
Sports and Recreation Zone: Bikes, balls, rackets, helmets, skateboards. Usually near the garage door for easy grab-and-go access. Wall-mounted hooks and racks keep these off the floor.
Vehicle Zone: The empty floor space where one or two cars park. Protect this space aggressively — it exists for cars, not overflow storage.
Sketch a rough floor plan on paper, assigning zones to specific walls and areas. Account for car door swing room (3-4 feet of clearance on each side) and walking paths.
Phase 3: Wall Storage Systems
The single most impactful change in a garage is getting storage onto the walls. Floor-standing items block movement, collect dust behind them, and create dead zones where junk accumulates. Wall-mounted storage is visible, accessible, and keeps the floor clear.
French Cleat System
A French cleat wall is the most versatile and cost-effective wall storage system. It consists of horizontal strips of plywood (or lumber) ripped at a 45-degree angle and mounted to the wall studs. Tool holders, shelves, bins, and hooks hang on matching cleats and can be rearranged endlessly.
Cost: A full wall of French cleats from 3/4-inch plywood costs $30-$60 in material for a 8x8-foot section. Add $20-$40 for the holders and accessories you build or buy.
Installation: Rip sheets of 3/4-inch plywood into 3-4 inch strips at a 45-degree bevel. Mount the wall strips to studs with 2.5-3 inch screws, spacing them every 6-8 inches vertically. Build custom tool holders from plywood scraps with matching bevels. The system is infinitely customizable — you can build holders for any tool, any size, any shape.
The appeal: No proprietary hardware, no ongoing costs, and complete flexibility. Move a holder from one spot to another in seconds. Add new holders as your tool collection grows.
Slatwall Panels
Commercial-grade slatwall panels are the premium option. These are PVC or MDF panels with horizontal grooves that accept standardized hooks, baskets, shelves, and brackets.
Cost: $15-$25 per 4x8-foot panel, plus $5-$15 per accessory (hooks, baskets, etc.). A full wall setup with accessories runs $200-$500.
Pros: Clean, professional appearance. Huge variety of purpose-built accessories. Easy installation (screw panels to studs). Waterproof PVC versions resist garage moisture.
Cons: Proprietary accessories add up in cost. Less customizable than a French cleat system for odd-shaped tools.
Brands: Gladiator (Whirlpool), Proslat, and Wall Control are the most common. The Wall Control metal pegboard/slatwall hybrid ($50-$80 for a 4x8 section) is a solid mid-range option that combines slatwall versatility with pegboard simplicity.
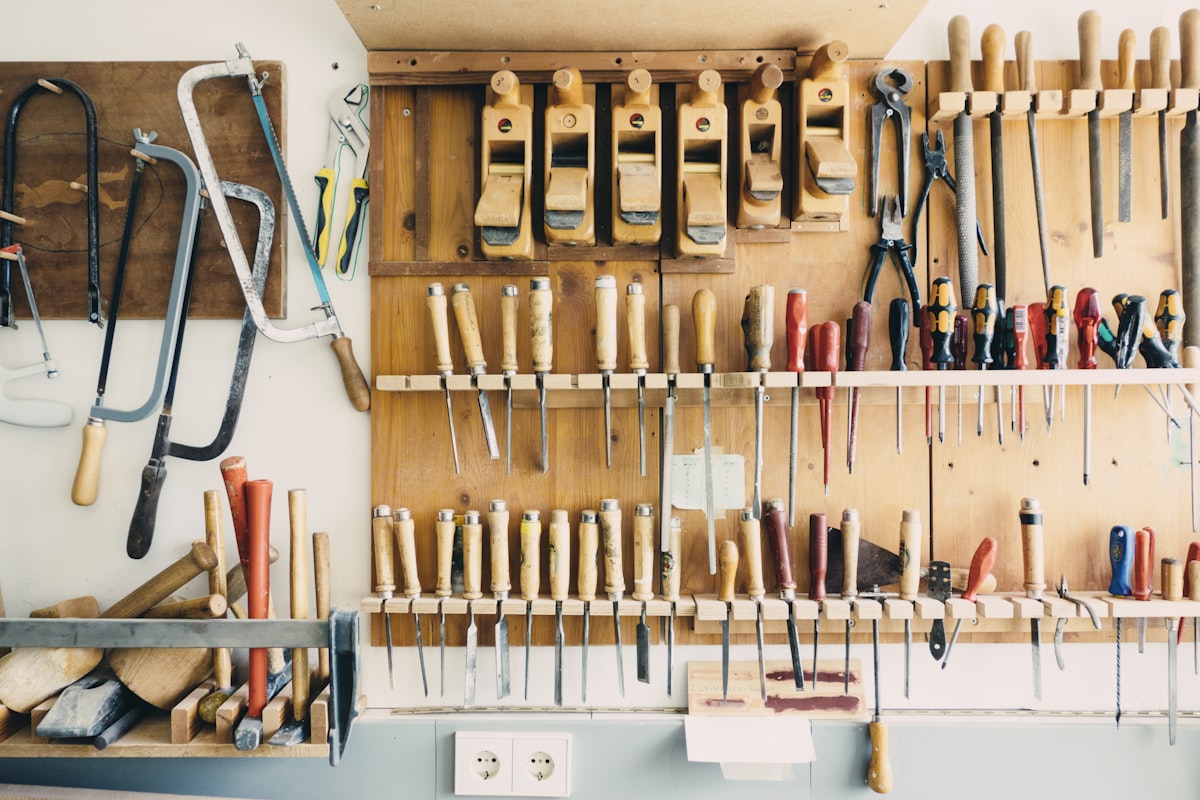
Pegboard
The classic workshop wall organizer. Hardboard pegboard ($15-$20 for a 4x8-foot sheet) with metal hooks ($10-$20 for an assortment pack) is the cheapest wall storage system.
Pros: Inexpensive, widely available, and most people are familiar with it.
Cons: Hooks fall out constantly (the single most common complaint about pegboard). The fix: use locking-style hooks ($15-$20 for a set) that clip into the holes rather than just resting in them, or add a small dab of hot glue to each hook’s peg. Metal pegboard (like Wall Control) holds hooks more securely than hardboard.
Best for: Hand tools, small items, and workshops where you want every tool visible on the wall.
Overhead Ceiling Storage
The ceiling of a two-car garage offers 400+ square feet of storage space that’s almost always empty. Overhead ceiling racks ($100-$300 for a 4x8-foot platform) mount to ceiling joists and hold 250-600 pounds of storage — seasonal items, bins of holiday decorations, camping gear, and other rarely accessed items.
Products: SafeRacks ($150-$250), Fleximounts ($100-$200), MonsterRax ($200-$300). These are steel frames that bolt to ceiling joists with lag bolts and typically have adjustable height (12-45 inches from ceiling).
Installation requirements: Must be anchored into ceiling joists, not just drywall. The joists must be structural — in some garages, bottom chords of trusses aren’t designed for storage loads. If you’re unsure, consult a structural engineer or stick to the manufacturer’s weight limits and ensure you’re hitting solid framing.
Overhead hoists: For bikes, kayaks, and other bulky seasonal items, a ceiling-mounted pulley hoist ($15-$30 per unit) raises the item to the ceiling and lowers it when needed. No climbing required.
Phase 4: The Workbench
A proper workbench transforms a garage from storage space into a functional workshop. You don’t need a $2,000 European woodworking bench (unless you’re a serious woodworker). You need a flat, sturdy surface at a comfortable working height with some storage underneath.
Build vs. Buy
Build your own: A 2x4 frame with a 3/4-inch plywood or MDF top costs $50-$100 in lumber. Dimensions: 6-8 feet long, 24-30 inches deep, 34-36 inches tall (standard counter height works for most people). Add a lower shelf for storage. This is a beginner-friendly woodworking project that takes 2-3 hours.
Buy: The Husky 62-inch adjustable workbench ($200-$300 at Home Depot) is a solid pre-built option with a hardwood top and steel frame. The Gladiator brand workbenches ($150-$400) are also popular. For budget builds, a solid-core door ($50-$80 at a salvage store or Home Depot) laid across two sawhorses or a pair of cabinets makes a large, flat, and surprisingly effective workbench.
Workbench Essentials
A bench without organization is just a table that collects clutter. Add:
- A bench vise ($40-$80 for a 6-inch bench vise) bolted to one corner. A vise holds work securely for sawing, drilling, filing, and gluing — it’s the third hand you always need.
- Power strip underneath the front edge for plugging in tools without running extension cords across the floor.
- Task lighting — an LED shop light ($20-$30) mounted directly above the bench. Good lighting is the most underrated workshop upgrade.
- Small parts storage — a set of stackable bin organizers ($15-$25) for screws, nails, bolts, washers, and hardware. The Akro-Mils small parts organizers are the workshop standard.
Phase 5: Specific Storage Solutions
Bikes
Bikes on the floor consume an enormous amount of space. Wall-mounted bike hooks ($5-$10 each) hang bikes vertically by the front wheel. A single bike takes up about 2 feet of wall space instead of 6 feet of floor space. For families with multiple bikes, a floor-to-ceiling bike rack ($60-$100 for 4 bikes) or ceiling-mounted pulley hoists keep them all off the ground.
Long-Handled Tools (Rakes, Shovels, Brooms)
A wall-mounted tool holder rail ($10-$20) with spring-loaded grips holds 8-12 long-handled tools in a 4-foot section of wall. No more rakes falling like dominos. Alternatively, individual tool hooks ($2-$3 each) screwed into a stud work fine.
Ladders
A wall-mounted ladder hook set ($10-$20) holds a ladder horizontally against the wall, out of the way. Place it high enough that you can walk underneath. Extension ladders are especially problematic on the floor — horizontal wall storage is the only practical answer.
Power Tools
Cordless tools and chargers benefit from a dedicated charging station — a shelf or section of workbench with a power strip and individual spots for each tool and battery. This keeps them charged, organized, and ready to grab.
Larger power tools (table saw, miter saw, planer) need floor space when in use but can be stored on rolling carts ($30-$80) that tuck against a wall when not in use. Many people build dedicated rolling tool stands from 2x4s and casters.
Bins and Containers
For all general storage, use clear plastic bins with lids ($5-$12 each depending on size). Clear bins let you see contents without opening them. Label every bin with a label maker or a piece of painter’s tape and a marker. Standard sizes stack uniformly, which maximizes vertical space on shelves or overhead racks.
Avoid cardboard boxes in the garage — they absorb moisture, attract pests, and collapse over time. Transition everything to plastic bins.
Flooring and Floor Protection
A clean, well-maintained garage floor completes the organized look and is easier to keep clean. Options range from free to expensive.
Sweep and seal (free to $50): A clean concrete floor sealed with a concrete sealer ($30-$50 per gallon, one gallon covers a two-car garage) resists stains and dust. Not fancy, but functional.
Interlocking floor tiles ($2-$5 per square foot): Snap-together PVC or polypropylene tiles cover stained or cracked concrete with a clean, professional surface. Easy DIY installation — no adhesive required. RaceDeck, Swisstrax, and MotorMat are common brands. For a two-car garage: $800-$2,000.
Epoxy coating ($100-$300 DIY, $1,500-$3,000 professional): The aspirational garage floor. Durable, chemical-resistant, and available in colours and chip patterns. DIY epoxy kits (Rust-Oleum RockSolid, $100-$150) work but require meticulous floor prep — etching, patching, and cleaning. Skipping prep causes peeling within a year. Professional application is dramatically more durable because they use commercial-grade epoxy or polyurea, diamond-grind the concrete, and apply it in multiple coats.
A Realistic Weekend Timeline
Saturday morning (3-4 hours): Empty the garage completely. Sort everything into keep, sell/donate, trash, and relocate piles. Load donations and trash into a vehicle or pile for pickup.
Saturday afternoon (2-3 hours): Sweep the garage. Plan zones and measure walls for storage systems. Make a hardware store trip for shelving, hooks, wall systems, and any organizational hardware.
Sunday morning (3-4 hours): Install wall-mounted storage systems (French cleats, slatwall, pegboard). Mount shelving brackets. Install ceiling storage if applicable. Assemble or install workbench.
Sunday afternoon (2-3 hours): Place items in their designated zones. Hang tools. Stock shelves and bins. Label everything. Stand back and admire.
Total time: 10-14 hours across two days. Total cost: $200-$500 for a functional system, $500-$1,500 for a polished setup with slatwall, overhead storage, and a quality workbench.
Maintaining the System
The organization only lasts if you maintain two habits.
The “everything has a home” rule. Every item that enters the garage gets assigned a specific location. When you’re done using it, it goes back. This sounds obvious and is shockingly hard to maintain — but it’s the difference between a garage that stays organized and one that returns to chaos within six months.
The annual purge. Once a year (pick a weekend in spring), repeat the sorting exercise. Remove anything that’s accumulated without a home, dispose of items you no longer need, and reassess whether your zones and storage still match how you actually use the space.
Frequently Asked Questions
How much does a full garage organization cost?
Budget tier ($100-$300): Pegboard, basic shelving, hooks, a few storage bins, and a DIY workbench from scrap lumber. Gets the job done without aesthetics. Mid-range ($300-$700): French cleat or slatwall on one wall, metal shelving, overhead storage rack, decent workbench, labelled bins. This is the sweet spot for most homeowners. Premium ($700-$2,000+): Slatwall on multiple walls, custom workbench with cabinets, overhead storage, epoxy floor, and matching storage systems. The “dream garage” level.
Can I organize a one-car garage and still park in it?
Yes, but it requires aggressive vertical storage. Use every inch of wall space and ceiling. Keep floor clear except for the workbench (positioned so the car clears it). Narrow shelving (12-16 inch depth) along the side walls doesn’t eat into parking width. In a one-car garage, the workbench often goes at the front wall, past where the car’s hood reaches, with wall storage above and beside it.
What’s the best shelving for a garage?
For heavy items (tool boxes, motor oil, bins of hardware), steel shelving is the most practical. A 5-tier steel shelf unit ($50-$80 for a 48x24x72-inch unit from brands like Muscle Rack or Edsal) holds 4,000+ pounds per unit. Wire shelving ($30-$60 per unit) is lighter-duty but works for bins and lighter items. Wood shelving built into wall studs ($20-$40 in lumber for a run of shelves) is cheap and customizable but takes longer to install.
How do I deal with humidity and moisture in the garage?
Garages are semi-conditioned spaces — subject to temperature swings and moisture. For tools, apply a light coat of WD-40 or Boeshield T-9 to metal surfaces to prevent rust. For stored items, use plastic bins (not cardboard). A dehumidifier ($150-$250) keeps humidity below 50% in damp climates, protecting tools and stored items. Seal any cracks in the garage floor that allow moisture migration — the same caulking techniques used indoors apply to concrete floor cracks as well.
Should I insulate my garage?
If you use the garage as a workshop, insulation makes it usable year-round. Garage door insulation kits ($60-$100) are the highest-impact improvement — the garage door is the largest uninsulated surface. Insulating walls and ceiling ($500-$1,500 for a two-car garage, DIY with fiberglass batts) adds comfort but is more work. If you’re not spending time working in the garage and just using it for parking and storage, insulation is low priority.