The average American household spends about $2,000 a year on energy. That’s roughly $170 a month going to heating, cooling, hot water, and keeping the lights on. Here’s what’s frustrating: a huge chunk of that money is literally leaking out of your house through gaps, cracks, and under-insulated walls that you probably don’t even know about.
I’m not going to tell you to buy solar panels and a Tesla Powerwall. Those are great if you have $30,000 sitting around. Instead, this guide focuses on the stuff that actually pencils out for normal homeowners — the $50 to $2,000 investments that pay for themselves in one to three years and keep paying you back for decades after.
Key Takeaways
- Air sealing is the single best investment you can make for energy efficiency. It’s cheap, it’s often DIY-able, and it can reduce heating and cooling costs by 15-25%.
- A home energy audit ($200-$400) tells you exactly where your money is going — skip guessing and get a blower door test done.
- Smart thermostats pay for themselves in under a year and keep saving indefinitely, especially when combined with geofencing and scheduling.
- Window replacement rarely pays for itself through energy savings alone — there are better places to spend $10,000-$20,000.
- Federal tax credits (25C) cover 30% of many efficiency upgrades through 2032, including insulation, air sealing, heat pumps, and energy audits.
Start With an Energy Audit
Before you buy a single roll of weatherstripping, find out where your house is actually losing energy. A professional energy audit with a blower door test costs $200-$400 and gives you a prioritised list of problems.
Here’s how a blower door test works: the auditor mounts a calibrated fan in your front door, depressurizes the house, and then walks around with a thermal camera and smoke pencil to see exactly where air is sneaking in and out. Attic hatches, electrical outlets on exterior walls, plumbing penetrations, the sill plate where your house meets the foundation — most homes have dozens of air leaks that are invisible until you depressurize the building.
The audit also checks your insulation levels, ductwork, water heater, and HVAC system. You’ll walk away knowing exactly where to spend your money for maximum return.
Many utilities offer free or subsidised energy audits. Check with your provider before paying full price. The federal 25C tax credit also covers 30% of audit costs up to $150.
Air Sealing: The Biggest Bang for Your Buck
If you do one thing from this entire article, air seal your house. The Department of Energy estimates that air leaks account for 25-40% of the energy used for heating and cooling in a typical home. That’s enormous.
Air sealing is also absurdly cheap. A case of Great Stuff spray foam ($5 per can, buy 6-8 cans), a few tubes of silicone caulk ($5 each), a roll of weatherstripping ($10), and a Saturday afternoon can make a noticeable difference in your next energy bill.
Where to Seal
The attic is priority number one. Warm air rises, and in winter your heated air is desperately trying to escape through every gap it can find between the living space and the attic. Common culprits:
- Around plumbing vent pipes that pass through the attic floor
- Around electrical wires where they penetrate the top plates of walls
- Around recessed light cans (use fire-rated covers if they’re IC-rated, or replace them with airtight LED retrofits)
- The attic hatch or pull-down stairs (weatherstrip the perimeter and add a rigid foam cover)
- Around the chimney chase (use metal flashing and high-temperature caulk here — never spray foam near a chimney)
- Ductwork connections in the attic (use mastic sealant, not duct tape, which fails within a few years)
The basement and crawl space are priority two. The rim joist — that band of wood where the floor framing meets the foundation wall — is one of the leakiest parts of most homes. Cut rigid foam board (XPS or polyiso) to fit between each joist bay, press it against the rim joist, and seal the edges with spray foam. This alone can be worth $100-$200 per year in heating savings in cold climates.
Doors and windows are priority three. Weatherstrip exterior doors if you can see daylight around the edges or feel a draft. Replace the door sweep if it’s worn or missing. For windows, apply rope caulk or V-strip weatherstripping to the sash channels. Skip the plastic film kits — they work, technically, but they look terrible and you’ll rip them off by February.
Air Sealing Costs and Savings
DIY air sealing: $50-$200 in materials. Professional air sealing: $1,000-$3,000 depending on house size and severity. Typical savings: 15-25% reduction in heating and cooling costs. Payback period: Usually under one year for DIY, one to three years for professional work.
Insulation: The Right Type in the Right Place
Air sealing and insulation work together. Sealing stops air movement; insulation slows heat transfer. Doing one without the other is like wearing a windbreaker full of holes — the jacket helps, but the holes undermine it.
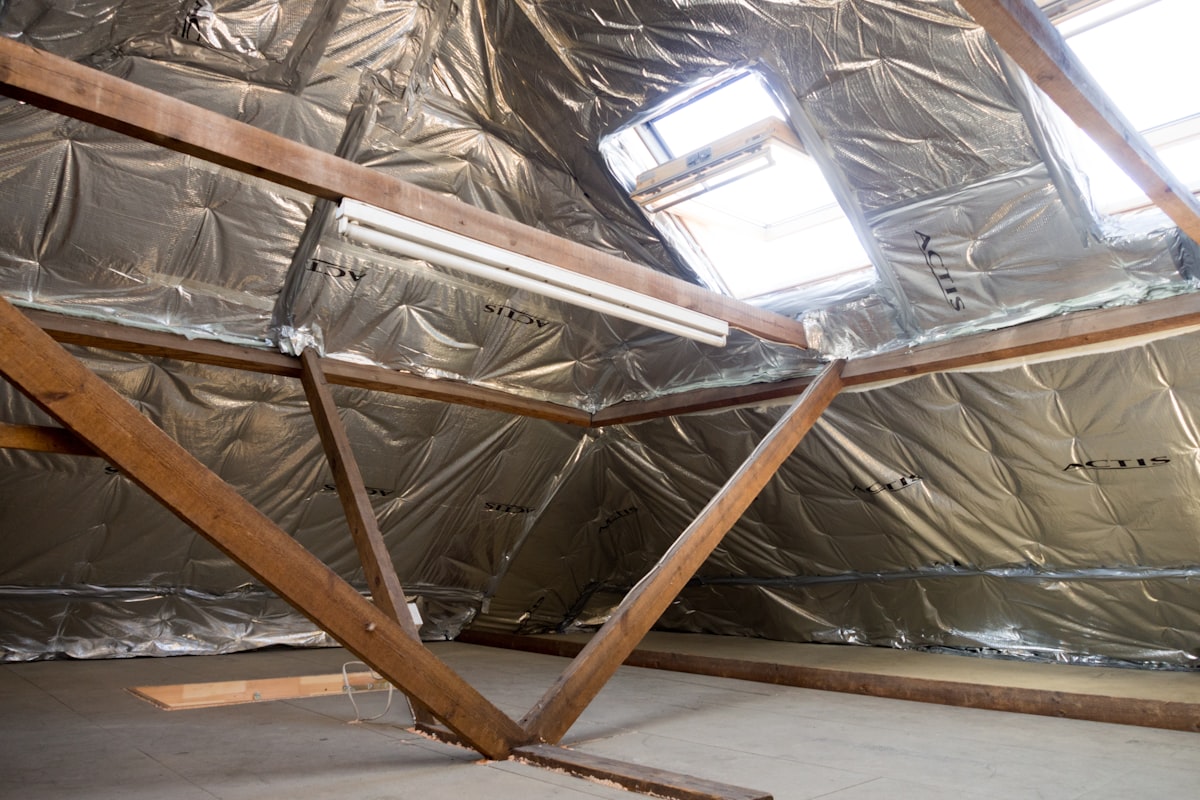
Attic Insulation
Your attic should have R-38 to R-60 of insulation depending on your climate zone (the DOE has a map by ZIP code). Most homes built before 2000 have far less. Measuring is easy: if you can see the tops of the ceiling joists in your attic, you don’t have enough.
Blown-in cellulose is the best value for attic insulation. You can rent a blowing machine from Home Depot for about $50/day when you buy 20 or more bags of insulation (around $12-$15 per bag). For a 1,500-square-foot attic, you’re looking at $500-$800 in material and a full day of work. It’s messy — wear a respirator, goggles, and old clothes — but straightforward.
Blown-in fibreglass (like Owens Corning AttiCat) is another option with a similar rental program. It’s less dusty than cellulose but provides slightly less R-value per inch.
Batts (the pink or yellow rolls) are fine for new construction where you’re insulating between open studs, but they’re terrible for retrofitting an attic with existing insulation, obstructions, and irregular joist spacing. They leave gaps. Use blown-in.
Wall Insulation
If your walls are uninsulated (common in homes built before the 1970s), blown-in dense-pack cellulose is the standard retrofit approach. A contractor drills small holes in each stud bay — from either the interior or exterior — and blows insulation in under pressure. It costs $1.50-$3.00 per square foot and typically requires a professional.
For most homeowners, attic insulation gives you 80% of the benefit for 30% of the cost of doing attic plus walls. Start with the attic.
Basement and Crawl Space
Uninsulated basement walls are a significant source of heat loss. Rigid foam board (2 inches of XPS or polyiso, R-10 to R-13) adhered directly to the foundation wall is the standard approach. Cover it with a thermal barrier (1/2-inch drywall is typical) if it’s in a finished or habitable space — building codes require this because foam is combustible.
For crawl spaces, the modern approach is to encapsulate: seal the floor with a heavy vapor barrier (20-mil poly), insulate the walls with rigid foam, and condition the space. This is more effective than insulating the floor above (which is the old-school method) and also helps with moisture and radon.
Smart Thermostats: Set It and Save
A smart thermostat is one of the fastest-payback upgrades you can make. The EPA estimates that an Energy Star certified smart thermostat saves about $50 per year on average, meaning a $79-$250 thermostat pays for itself in one to five years. In practice, savings are often higher, especially if you were previously heating and cooling an empty house all day.
The Google Nest Learning Thermostat ($279) and the Ecobee Smart Thermostat Premium ($249) are the two leading options. For a detailed comparison, including installation tips and which ecosystem they work with, check out our smart home guide — the smart thermostat section covers this in depth.
The real savings come from three features:
Scheduling: Program the thermostat to reduce heating/cooling when you’re asleep or away. The old “set it and forget it” advice is wrong — “set a schedule and let the thermostat follow it” is the right approach.
Geofencing: The thermostat detects when your phone leaves a defined radius and switches to an away mode. No more heating an empty house because you forgot to adjust the temperature before leaving.
Remote sensors: The Ecobee includes a room sensor that ensures the room you’re actually using reaches the right temperature, rather than the hallway where the thermostat lives. This prevents the system from running longer than necessary.
Many utilities offer $50-$100 rebates on smart thermostats. Some give them away for free. Check your utility’s website before buying.
Window Upgrades: Probably Not What You Think
I’ll be honest — this is where I see homeowners make the biggest financial mistake in the name of energy efficiency.
Replacing all the windows in a typical house costs $10,000-$25,000. The energy savings from going from single-pane to double-pane low-E windows is real but modest: $150-$400 per year depending on climate, house size, and how bad the old windows were.
Do the math. At $300/year in savings on a $15,000 investment, the payback period is 50 years. Your new windows won’t last that long.
When replacement makes sense:
- Your windows are literally broken, fogged (seal failure), or rotting
- You’re already doing siding or a major exterior renovation and can combine the work
- You have single-pane windows in a very cold or very hot climate
- Comfort matters more than payback — new windows do reduce drafts and noise significantly
What to do instead:
- Weatherstrip and caulk around existing window frames (covered in the air sealing section above)
- Add storm windows over existing single-pane windows ($100-$200 per window, 70% of the benefit of full replacement at 20% of the cost)
- Apply low-E window film ($15-$30 per window) to reduce solar heat gain in summer
If you do replace windows, get at least three quotes and look for Energy Star certified units with a U-factor appropriate for your climate zone. And claim the 25C tax credit — 30% of the cost up to $600 for exterior windows.
LED Lighting: The Easy Win
If you still have incandescent or halogen bulbs anywhere in your house, replacing them with LEDs is free money. Not “it pays for itself eventually” — literally free money starting the first month.
A 60-watt equivalent LED uses about 8 watts and costs $1-$2 per bulb. An incandescent costs $1 per bulb but uses 60 watts. If you run a light 5 hours a day, the incandescent costs about $11 per year in electricity versus $1.50 for the LED. Multiply that by 30-40 light fixtures in a typical home and you’re talking $300+ in annual savings.
Buy LED bulbs in bulk. A 24-pack of Philips or GE 60-watt equivalent A19 bulbs costs $20-$30 at any hardware store. It’s the most boring home improvement project imaginable, and one of the most effective.
Match the colour temperature to the room. 2700K (warm white) for living rooms and bedrooms. 3000K for kitchens and bathrooms. 4000K-5000K (daylight) only if you want your home to feel like a hospital — which, to be clear, you don’t.
Water Heating: The Forgotten Energy Hog
Water heating accounts for about 18% of a typical home’s energy use — second only to heating and cooling. Most people never think about it.
Turn down the tank. Most water heaters ship set to 140°F. The DOE recommends 120°F. That 20-degree reduction saves 6-10% on water heating costs and reduces the risk of scalding. It takes 30 seconds to adjust the dial on the tank.
Insulate the tank and pipes. A water heater insulation blanket ($25-$35) reduces standby heat loss by 25-45%. Foam pipe insulation ($0.50-$1.00 per foot) on the first 6 feet of hot and cold pipes leaving the tank saves another $10-$20 per year.
Consider a heat pump water heater when your current tank dies. A heat pump water heater (like the Rheem ProTerra or A.O. Smith Voltex) uses 60-70% less electricity than a standard electric tank. They cost $1,500-$2,500 installed versus $800-$1,200 for a standard electric tank, but the federal 25C tax credit covers 30% (up to $2,000), and the energy savings are $200-$400 per year. The payback is typically 3-5 years.
Safety note: Gas water heaters should only be serviced or replaced by a licensed plumber. Gas line work is not a DIY job.
HVAC: Maintenance Before Replacement
Before you consider replacing your furnace or air conditioner, make sure the one you have is actually running efficiently. Poorly maintained systems can lose 5-15% efficiency per year.
Change the filter. This is embarrassingly simple but enormously common. A clogged filter makes your system work harder, use more energy, and wear out faster. Check it monthly, replace it every 1-3 months. The Filtrete 1900 (MPR 1900) is a good balance of filtration and airflow.
Seal and insulate your ductwork. Leaky ducts in unconditioned spaces (attics, crawl spaces, garages) can waste 20-30% of the air your system produces. Seal joints with mastic sealant or metal tape (not “duct tape”), then insulate with R-6 or R-8 duct insulation. This is a dirty, unglamorous job, but it makes a real difference.
Schedule annual maintenance. A professional HVAC tune-up ($100-$200) once a year catches small problems before they become expensive failures. They’ll check refrigerant levels, clean coils, test safeties, and verify airflow.
When replacement time does come, heat pumps are the headline story in 2026. A modern cold-climate heat pump (like the Mitsubishi Hyper-Heat or Bosch IDS 2.0) operates efficiently down to -15°F and can handle both heating and cooling. The federal 25C credit covers 30% of the cost up to $2,000, and the Inflation Reduction Act provides additional rebates for qualifying households. Talk to at least three HVAC contractors and get Manual J load calculations done — oversizing is the most common installation mistake and it creates humidity problems.
Rebates, Tax Credits, and How to Claim Them
The federal government and most states are basically handing out money for energy efficiency upgrades right now. Here’s what’s available through 2032 under the Inflation Reduction Act:
Federal 25C Tax Credit (Energy Efficient Home Improvement Credit):
- 30% of cost for insulation, air sealing, doors, windows, heat pumps, heat pump water heaters, electrical panel upgrades, and home energy audits
- Annual caps apply: $1,200 total per year, with a $2,000 sub-cap for heat pumps and heat pump water heaters
- Window cap: $600 per year
- Audit cap: $150
State and utility rebates: These vary wildly. Some utilities offer $500-$1,000 for heat pump installations, $50-$100 for smart thermostats, and free energy audits. The Database of State Incentives for Renewables and Efficiency (DSIRE) at dsireusa.org is the best resource for finding what’s available in your area.
How to claim the 25C credit: Keep your receipts and the manufacturer’s certification statement. File IRS Form 5695 with your tax return. It’s a credit, not a deduction — it directly reduces your tax bill dollar for dollar.
The Priority Checklist
If you’re wondering where to start, here’s the order I’d tackle things based on cost-effectiveness:
- LED bulbs everywhere (immediate payback, minimal effort)
- Air sealing (DIY for $50-$200, biggest single improvement)
- Smart thermostat (pays for itself in under a year, ties into your smart home system)
- Attic insulation (if below recommended levels, DIY for $500-$800)
- Water heater temperature reduction and insulation (free to $35, immediate savings)
- Duct sealing (DIY for $50-$100, significant if ducts are in unconditioned space)
- HVAC maintenance ($100-$200/year, prevents efficiency loss)
- Storm windows or window film (if you have single-pane windows)
- Heat pump water heater (when your current tank fails)
- Heat pump HVAC (when your current system fails)
You don’t need to do everything at once. Knock out items 1-5 this year, and you’ll likely see your energy bills drop 25-40%. That’s real money back in your pocket every single month.
Frequently Asked Questions
How much can I realistically save on my energy bill?
It depends on your starting point. A leaky, under-insulated home with incandescent bulbs and an old thermostat set to 72°F all day? You could cut your bill by 40-50% with the measures in this guide. A newer, reasonably well-sealed home? Maybe 15-25%. The energy audit is the only way to get a real number for your specific house. But almost every home has at least $300-$500 per year in low-hanging fruit.
Is spray foam insulation worth the extra cost?
Closed-cell spray foam is an excellent insulator and air barrier in one product, but it costs 3-4 times as much as blown-in cellulose per R-value. It’s worth the premium in specific applications: rim joists, crawl space walls, cathedral ceilings where space is limited, and areas where you need both air sealing and insulation in a single step. For open attics where you have unlimited space, blown-in cellulose at a fraction of the cost gets you to the same R-value.
Do those home energy monitoring devices actually help?
Devices like the Sense or Emporia Vue energy monitor ($150-$300) clamp onto your electrical panel and track energy usage by circuit or individual appliance. They’re genuinely useful for identifying phantom loads and energy hogs you didn’t know about. Many people discover that their old beer fridge in the garage costs $15-$20/month to run, or that their pool pump is consuming far more than expected. The awareness alone changes behaviour.
Should I upgrade my electrical panel for energy efficiency?
Not specifically for efficiency, but you might need to. If you’re adding a heat pump HVAC system, a heat pump water heater, an EV charger, or an induction range, your existing 100-amp panel might not have enough capacity. A panel upgrade to 200 amps costs $1,500-$3,000 and is covered at 30% by the 25C tax credit. This is strictly a licensed electrician job — do not attempt panel work yourself.
Are whole-house fans still worth it?
Yes, in the right climate. A whole-house fan ($300-$800 installed) pulls cool evening air through the house and exhausts hot attic air. In dry climates where summer nights drop below 70°F, they can drastically reduce air conditioning use — sometimes eliminating it for months. They’re less effective in humid climates where nighttime temperatures stay warm and muggy. The QuietCool line is popular for being significantly quieter than older models.