A running toilet wastes up to 200 gallons of water per day. At the average US water rate of $0.015 per gallon, that’s $3 per day — roughly $90 per month added to your water bill. A plumber charges $150-$250 to fix it. The parts cost $8-$15 at any hardware store. The repair takes 10-20 minutes. This is the single best return-on-investment DIY repair you can make as a homeowner, and it requires zero special skills.
Every running toilet falls into one of three categories: a bad flapper, a faulty fill valve, or an incorrect water level. That’s it. Three possible problems, three straightforward fixes. Once you understand what’s happening inside the tank, you’ll wonder why you ever considered calling a plumber for this.
Key Takeaways
- A running toilet is almost always caused by one of three things: a worn flapper valve, a malfunctioning fill valve, or water level set too high.
- The flapper is the culprit about 70% of the time. It’s a $5 rubber piece that wears out every 3-5 years.
- You don’t need to turn off your home’s main water supply. Each toilet has its own shutoff valve at the wall.
- No special tools are required. Your hands and possibly a pair of pliers are all you need.
- If the toilet is leaking at the base (not running in the bowl), that’s a different problem — a failed wax ring — and it’s a bigger job, though still DIY-able.
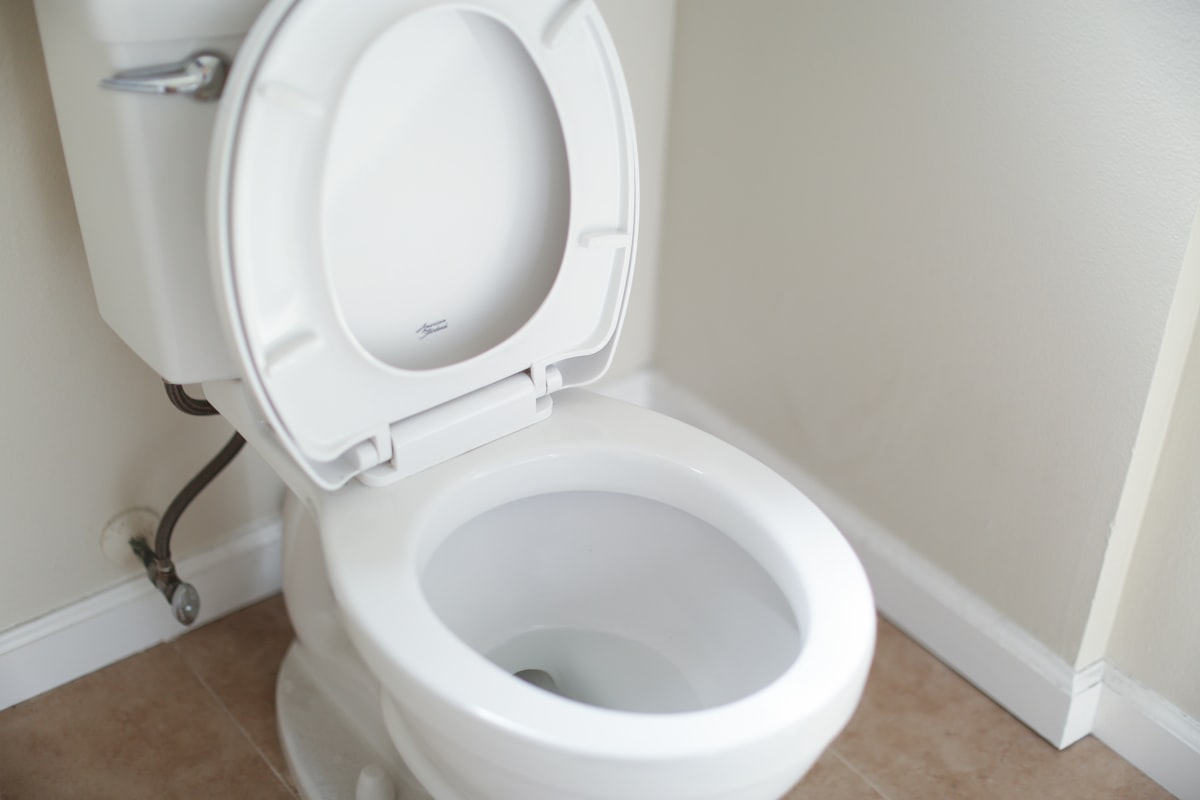
How a Toilet Actually Works
Before you fix anything, spend 30 seconds understanding the mechanism. Take the tank lid off (it just lifts straight up — set it on a towel so it doesn’t crack) and look inside. There are only a few moving parts.
The fill valve is the tall assembly on the left side of the tank. It connects to the water supply line at the bottom and refills the tank after a flush. Modern fill valves are plastic with a float that rides up and down on the valve body. Older toilets may have a ball-cock valve with a float ball on a metal arm — same function, different design.
The flapper is the rubber or silicone disc at the bottom centre of the tank, covering the flush valve opening. When you push the flush handle, a chain lifts the flapper, water rushes from the tank into the bowl, and the flapper falls back into place when the tank empties. The flapper is what seals the tank between flushes.
The overflow tube is the open-topped vertical tube next to the flapper. If the water level in the tank rises too high (because the fill valve doesn’t shut off), water flows into the overflow tube and down into the bowl rather than flooding your bathroom floor. It’s a safety feature, but if water is constantly flowing into it, you hear a perpetual running sound.
The flush handle and chain connect the exterior handle to the flapper. Push the handle, the lever pulls the chain, the chain lifts the flapper. Simple mechanical linkage.
That’s the whole system. Water fills the tank, the flapper holds it there, you flush, the flapper opens, water goes to the bowl, the flapper closes, the fill valve refills the tank, and the cycle resets. A running toilet means one of those steps isn’t completing properly.
Step 1: Diagnose the Problem
There are three diagnostic tests. Do them in order — each takes about 30 seconds.
The Food Colouring Test (Flapper Check)
Remove the tank lid. Drop 5-10 drops of food colouring (or a dye tablet, which some hardware stores give away free) into the tank water. Don’t flush. Wait 15-20 minutes, then look in the bowl. If the water in the bowl is now coloured, the flapper is leaking. Water is seeping past the flapper seal from the tank into the bowl, which triggers the fill valve to run periodically to maintain the tank level. This is the most common cause of a running toilet.
The Float and Fill Valve Check
Look at the water level in the tank. There’s usually a line marked on the inside of the tank or on the overflow tube indicating the correct water level — typically about 1 inch below the top of the overflow tube. If the water level is at or above the top of the overflow tube, water is constantly draining into the tube and the fill valve keeps running to replace it. This means either the float is set too high or the fill valve isn’t shutting off properly.
The Chain Check
Flush the toilet and watch the flapper. Does it close promptly after the tank empties, or does it hang open? If the chain is too short, it holds the flapper partially open. If the chain is too long, it can get caught under the flapper when it closes, breaking the seal. The chain should have about 1/2 inch of slack when the flapper is seated.
Step 2: Fix a Leaking Flapper
If the food colouring test confirmed a flapper leak, replacing the flapper is your fix. This is a five-minute job.
What You Need
- Replacement flapper: Korky 100BP ($4-$6) fits most standard toilets, or Fluidmaster 502 ($5-$7). If your toilet is a specific brand like Kohler or American Standard, check for brand-specific flappers — they sometimes have proprietary designs. Bring the old flapper to the hardware store if you’re unsure.
Steps
-
Turn off the water supply. The shutoff valve is on the wall behind the toilet, near the floor. Turn it clockwise until it stops. This stops water flow to the toilet only — the rest of your house is unaffected.
-
Flush the toilet to empty the tank. Hold the handle down to drain as much water as possible.
-
Remove the old flapper. It typically hooks onto two pegs on either side of the overflow tube. Unhook both ears and disconnect the chain from the flush lever arm. Note how the chain connects — you’ll replicate this with the new flapper.
-
Install the new flapper. Hook the ears onto the same pegs. Connect the chain to the same hole on the flush lever arm. Adjust the chain length so there’s about 1/2 inch of slack when the flapper is seated — not tight, not loose enough to tangle.
-
Turn the water back on. The tank refills. Check that the flapper seats properly and the water stops running once the tank is full.
-
Repeat the food colouring test to confirm the leak is fixed.
When the Flapper Isn’t the Problem
Sometimes the flapper is fine but the flush valve seat (the ring the flapper sits on) is corroded or mineral-crusted. Run your finger around the seat. If it feels rough, gritty, or uneven, clean it with an abrasive pad (Scotch-Brite) or fine emery cloth. A perfectly good flapper can’t seal against a rough surface.
If the flush valve seat is cracked or severely corroded, you’ll need to replace the entire flush valve — which means pulling the toilet. That’s a bigger project (1-2 hours), but still DIY-able with a toilet repair kit ($20-$30).
Step 3: Fix the Fill Valve
If the water level is above the overflow tube, or if the fill valve keeps running even after the tank is full, the fill valve needs adjustment or replacement.
Adjusting the Water Level
Modern fill valves (Fluidmaster-style): Look for an adjustment screw or clip on the fill valve body. Turning the screw or sliding the clip changes the float height, which determines when the valve shuts off. Lower the float to reduce the water level. The target is about 1 inch below the top of the overflow tube.
Old-style ball-cock valves: Bend the float arm slightly downward. This lowers the float ball, which shuts off the valve at a lower water level. If the ball has water inside it (it should be hollow and dry), it’s waterlogged and won’t float high enough — replace it or replace the entire fill valve with a modern one.
After adjusting, flush and watch the tank refill. The water should stop running when it reaches the correct level. If it doesn’t, the fill valve itself is faulty.
Replacing the Fill Valve
A complete fill valve replacement is a 15-minute job and the definitive fix for any fill valve problem. The Fluidmaster 400A ($8-$10) is the industry standard — it fits virtually every toilet and has been the go-to replacement for decades.
What you need:
- Fluidmaster 400A fill valve or equivalent
- Adjustable pliers or a wrench
- A towel and a small bucket or container
Steps:
-
Turn off the water supply at the wall shutoff valve.
-
Flush the toilet and sponge or towel out the remaining water in the tank bottom. Put the towel on the floor behind the toilet — some water will drip.
-
Disconnect the water supply line from the bottom of the fill valve. Use pliers to loosen the coupling nut. Have the bucket ready — water in the line will drain out.
-
Remove the old fill valve. Unscrew the lock nut on the outside bottom of the tank (it holds the fill valve in place). Lift the old valve straight out from inside the tank.
-
Adjust the new fill valve height. The Fluidmaster 400A is adjustable — twist the body to set the height so the top of the valve (the “critical level” mark) sits about 1 inch above the overflow tube.
-
Insert the new fill valve into the tank hole. Hand-tighten the lock nut on the outside. Then snug it an additional half turn with pliers — don’t overtighten, as the tank is porcelain and can crack.
-
Reconnect the water supply line. Hand-tighten the coupling, then a quarter turn with pliers.
-
Connect the refill tube. The small flexible tube from the fill valve clips onto the overflow tube. This tube sends a small stream of water into the overflow tube during refilling, which replenishes the water in the bowl.
-
Turn on the water supply. Check for leaks at the bottom connections. Adjust the water level if needed using the adjustment screw on the fill valve.
Safety note: Porcelain toilet tanks crack if overtightened. When tightening any connection on the tank, use hand-tight plus a quarter turn with pliers. If it leaks, tighten an additional quarter turn. Never use a wrench on a porcelain fitting with full force.
Step 4: Fix the Chain
A chain that’s too long, too short, or tangled causes intermittent running or incomplete flushes.
Too short: The flapper can’t fully seat because the chain holds it slightly open. You’ll hear a constant trickle. Reconnect the chain to a hole farther from the handle on the lever arm, or replace the chain with a longer one (most replacement flappers include a new chain).
Too long: Excess chain can slide under the flapper when it closes, preventing a seal. The toilet runs intermittently as water slowly leaks past the caught chain. Shorten the chain by hooking it to a closer hole on the lever arm, or clip the excess with wire cutters, leaving about 1 inch beyond the connection point.
Tangled: Old chains develop kinks that prevent smooth operation. Replace it — a universal flapper chain costs $3-$4 and takes two minutes to install.
When to Call a Plumber
Most running toilet issues are straightforward DIY territory. But a few situations warrant professional help.
Cracked tank or bowl. If the porcelain itself is cracked and leaking, you need a new toilet. A plumber installs a standard toilet for $200-$400 (toilet included) in about an hour.
Persistent leak at the base. Water pooling around the base of the toilet (not from the tank, but from the floor connection) indicates a failed wax ring. Replacing a wax ring requires removing the entire toilet, scraping the old ring, and re-setting the toilet — it’s a DIY-able job, but it’s more involved and requires some physical strength to lift and re-set the toilet, which weighs 60-80 pounds.
Old shutoff valve that won’t turn. Gate valves on older homes (the round handle type) seize up after years of non-use. Forcing them can break the valve and cause a flood. If your shutoff valve won’t budge, don’t force it. A plumber can replace it with a modern quarter-turn ball valve ($50-$100 including labour).
Cast iron or galvanized supply lines. Homes built before 1960 may have corroded iron supply lines. If disconnecting the supply line reveals heavy corrosion, green/white mineral buildup, or the connection crumbles when touched, stop and call a plumber. Old corroded plumbing can fail unpredictably.
Preventive Maintenance
A toilet’s internal parts are consumable. Building a few habits prevents emergency repairs.
Replace the flapper every 4-5 years even if it’s not visibly deteriorated. Rubber degrades over time, especially in chlorinated water. A $5 flapper replaced proactively saves the water waste and annoyance of waiting until it fails.
Check the chain annually. Give it a visual inspection when you clean the toilet. Is it kinked? Corroded? Too long? Thirty seconds of attention prevents running issues.
Don’t use in-tank cleaning tablets (the ones you drop in the tank). Chlorine-based tablets degrade rubber and plastic parts faster, shortening flapper and fill valve life. Clean the bowl directly instead.
Know where your shutoff valve is and test it once a year. Turn it off and on to keep it from seizing. This applies to every fixture in your house — the day you need a shutoff valve in an emergency, you need it to work. This same principle applies to all your home systems. If you’re working on making your home more efficient and lower-cost overall, our energy efficiency guide covers the bigger picture of home maintenance that saves money.
Understanding Your Water Bill Impact
A running toilet is often invisible — it doesn’t create a puddle or a dramatic leak. It silently runs up your water bill. Here’s how to estimate the damage.
A toilet that runs constantly (fill valve never shuts off, water flowing into overflow tube) wastes 4,000-7,000 gallons per month. At average US water/sewer rates, that’s $60-$100 per month.
A toilet that runs intermittently (flapper leak, phantom flushes every 15-30 minutes) wastes 1,000-4,000 gallons per month. Cost: $15-$60 per month.
A toilet with a slow flapper leak (fails the food colouring test but doesn’t audibly run) wastes 200-1,000 gallons per month. Cost: $3-$15 per month.
Even the slow leak adds up. Over a year, a minor flapper leak costs $36-$180 in water. The flapper to fix it costs $5. If you’re tracking your home’s overall efficiency, fixing running toilets is usually the single highest-impact repair you can make, ahead of weather stripping or even smart thermostat installation.
Frequently Asked Questions
Can I fix a running toilet without turning off the water?
Technically, yes — you can replace a flapper without shutting off the water if you work quickly. The tank refills while you work, and you’ll get wet. But there’s no good reason to skip turning off the shutoff valve. It takes three seconds, keeps the tank empty while you work, and prevents water from spraying if something unexpected happens. Always turn off the water.
My toilet runs only at night. What’s happening?
Temperature changes at night cause the tank components to contract slightly, which can break the seal on a marginally worn flapper. This is actually the earliest sign of a flapper that’s starting to fail. Replace it now — it’s only going to get worse.
How do I know if my toilet has a standard or proprietary flapper?
Look at the flapper currently installed. Standard flappers hook onto two pegs on the sides of the overflow tube. Proprietary flappers (common on Kohler, Toto, and some American Standard models) may have different mounting systems — clips, twist-locks, or frames. If your flapper doesn’t use the standard two-peg mount, note the toilet manufacturer and model number (usually stamped inside the tank) and buy the matching OEM flapper. Universal flappers claim to fit “most toilets” but often don’t seal properly on proprietary flush valves.
My toilet was recently installed and it’s already running. Is it defective?
Possibly, but more likely the chain length is wrong or the fill valve water level needs adjusting. New toilets are rarely defective — they’re just not always set up perfectly during installation. Run through the diagnostic steps above before assuming a warranty issue. Nine times out of ten, it’s a chain or float adjustment that takes 30 seconds.
The toilet stops running when I jiggle the handle. What does that mean?
Jiggling the handle re-seats the flapper. This means the flapper is worn, warped, or the chain is tangling. Jiggling is a temporary fix that costs you water until you actually replace the flapper. It’s the running toilet equivalent of hitting the side of the TV — it works, but it’s not a solution.