I’ll be honest — most people oversize their first garden. They get excited, build four raised beds, order twelve varieties of seeds, spend a weekend planting, and by mid-July they’re drowning in zucchini they can’t give away while the tomatoes have blight and the lettuce bolted three weeks ago. Then the whole thing becomes a chore instead of a hobby, and by next spring the beds are full of weeds.
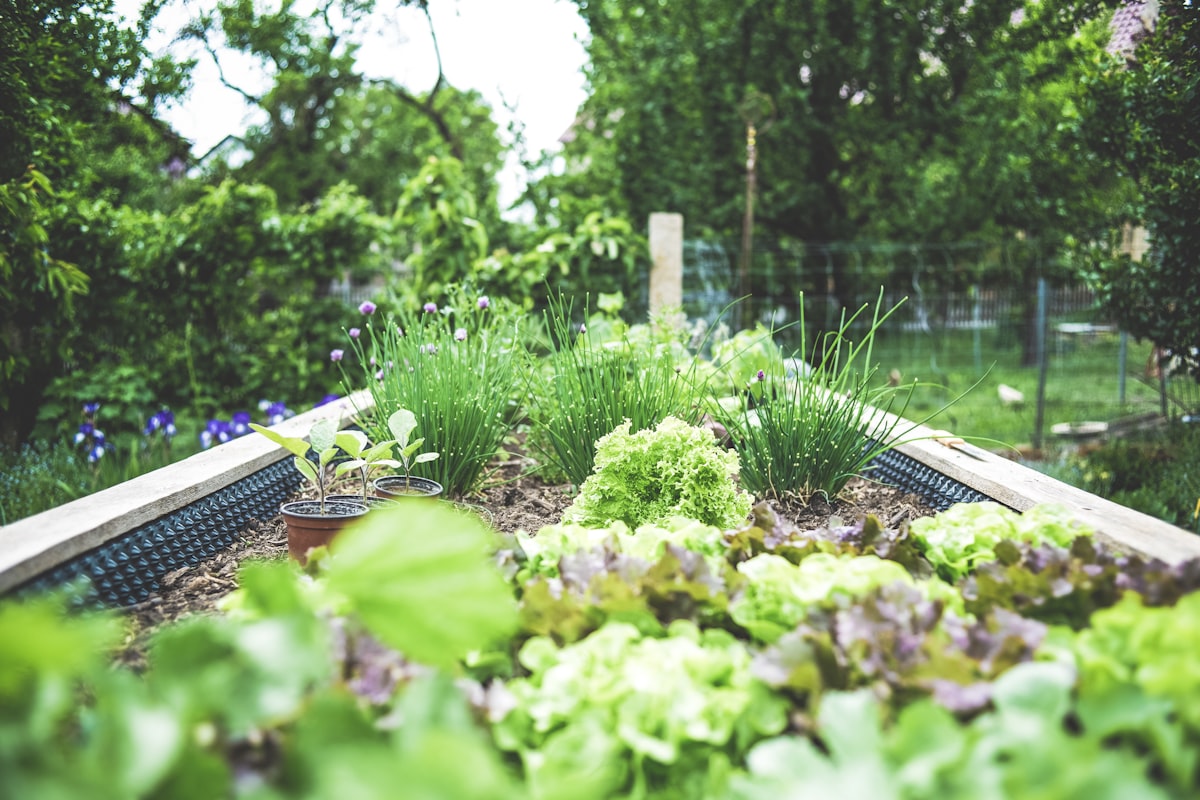
Start small. A single 4x8-foot raised bed, planted with five or six things you actually eat, will teach you more in one season than a 200-square-foot garden will — and you’ll actually enjoy it.
Key Takeaways
- Start with one 4x8-foot raised bed. It’s enough to grow a meaningful amount of food without becoming overwhelming.
- Soil is everything. Spend your money on good soil and compost, not fancy tools or gadgets.
- Grow what you eat. Sounds obvious, but people plant things because they seem “easy” rather than because they’ll use them.
- Water deeply and less often rather than a light sprinkle every day. Most beginners overwater or underwater — rarely do they get it right the first year, and that’s fine.
- Your first season is a learning experience. Some things will fail. That’s normal and expected.
Raised Bed vs. In-Ground: Just Pick One
This decision paralyses new gardeners. Both work. Here’s the real difference.
Raised beds are better if your native soil is compacted clay, rocky, contaminated (common in older urban lots — get a soil test if you’re unsure), or if you have drainage issues. They’re also easier on your back and knees since you’re working 10-12 inches off the ground. The downside is upfront cost: building or buying a raised bed plus filling it with soil runs $150-$400 per bed.
In-ground gardens are cheaper to start. If you have decent native soil (loamy, well-draining, not compacted concrete), you can start a garden with a shovel, a bag of compost, and a rake. The downside is more weeding, more bending, and you’re at the mercy of whatever soil you’ve got.
For most first-time gardeners, I recommend a raised bed. You control the soil from the start, which eliminates the biggest variable. A 4x8-foot bed gives you 32 square feet of growing space — enough for a surprising amount of food.
Building a Raised Bed
You don’t need to overthink this. A basic raised bed is four boards screwed together. That’s it.
Materials for a 4x8-foot bed, 12 inches tall:
- Four 2x12 boards (two at 8 feet, two at 4 feet) — untreated cedar ($80-$120) or Douglas fir ($40-$60)
- Sixteen 3-inch exterior wood screws
- A drill
Cut your boards to length (or have the lumber yard do it), pre-drill the corners to prevent splitting, and screw them together. Set the frame on level ground. Done. Total build time: 30 minutes.
Cedar lasts 10-15 years without treatment. Douglas fir lasts 5-7 years. Pine is cheapest but rots in 2-3 years. Don’t use pressure-treated lumber from before 2004 (it contained arsenic). Modern pressure-treated lumber uses copper-based preservatives and is considered safe by the EPA for raised beds, but many gardeners prefer untreated wood for peace of mind.
Pre-made alternatives: If you don’t own a drill, the Birdies raised bed (corrugated metal, $130-$200) is excellent and lasts essentially forever. Vego Garden makes a similar product. Both ship flat and assemble with bolts in 15-20 minutes.
Filling the Bed
This is where your money goes and where it matters most. Do not fill a raised bed with topsoil from the hardware store and call it done. That bagged topsoil is often heavy clay with minimal organic content.
The standard raised bed mix is roughly:
- 60% topsoil
- 30% compost
- 10% aeration amendment (perlite, vermiculite, or coarse sand)
For a 4x8-foot bed that’s 12 inches deep, you need about 32 cubic feet of material. That’s roughly one cubic yard. A cubic yard of quality garden mix from a local landscape supply company (look for “raised bed mix” or “garden blend”) costs $40-$80 delivered. This is substantially cheaper and better quality than buying individual bags from Home Depot.
If you’re buying bagged: expect to need 15-20 bags of 2-cubic-foot soil plus 4-5 bags of compost. At $5-$8 per bag, you’re looking at $100-$175. The bulk delivery is almost always the better deal.
Soil Basics You Actually Need to Know
You don’t need a degree in soil science. You need to understand three things.
Organic matter is the engine. Compost feeds the soil organisms that make nutrients available to your plants. Every year, top-dress your beds with 1-2 inches of compost before planting. This is the single most important maintenance task. Good compost smells earthy, looks dark, and crumbles in your hand. If it smells like ammonia or looks like it still has recognisable food scraps in it, it’s not ready.
Soil pH affects nutrient availability. Most vegetables prefer a pH between 6.0 and 7.0. A basic soil test ($10-$15 at your local extension office, or buy a kit from Amazon) tells you where you stand. If your pH is below 6.0, add garden lime. If it’s above 7.5, add sulphur. Most garden-blend soils from landscape supply companies fall in the right range, so this is more of a concern for in-ground gardens.
Drainage matters more than fertility. Plants can handle imperfect nutrients but cannot handle waterlogged roots. If you squeeze a handful of moist soil and it holds its shape like Play-Doh, it’s too dense. If it crumbles apart, it’s about right. Raised beds with a proper soil mix inherently drain well, which is another argument in their favour.
What to Plant: Start With These
Pick five or six things from this list based on what you actually eat. Growing obscure heirloom peppers is fun in year three. In year one, grow things that are forgiving and rewarding.
Tomatoes. The reason most people start a garden. Buy transplants (small plants from the garden centre), not seeds — tomatoes need 6-8 weeks of indoor starting and that’s an unnecessary complication for a first-year gardener. One healthy tomato plant produces 10-20 pounds of fruit over a season. Plant two or three, give them cages or stakes, and you’ll have more tomatoes than you can eat by August. The Early Girl variety is nearly bulletproof for beginners.
Zucchini or summer squash. Absurdly productive. One plant — seriously, just one — will produce more zucchini than a family of four can consume. Two plants is a neighbourhood giveaway programme. They’re fast-growing, hard to kill, and great for building confidence. The downside: squash vine borers, which are a regional pest. If you see sawdust-like frass at the base of the stem, you’ve got borers. Cover the base with row cover or wrap the lower stem with aluminium foil as a preventive.
Lettuce and salad greens. Fast to harvest (30-45 days from seed to salad), easy to grow, and expensive to buy organic at the grocery store. Direct-sow seeds every two weeks for continuous harvest — this is called succession planting. Lettuce bolts (goes to seed and turns bitter) in hot weather, so plant it in spring and fall, and give it afternoon shade in summer. Varieties like Black Seeded Simpson and Red Sails are forgiving.
Bush beans (green beans). Drop the seeds an inch deep, water, and wait. They germinate in a week and produce beans in 50-60 days. Bush varieties don’t need trellising. Provider and Contender are reliable varieties. Beans also fix nitrogen in the soil, which benefits whatever you plant in that spot next year.
Herbs: basil and cilantro. Fresh herbs make the biggest taste difference between garden and grocery store produce. Basil is a warm-weather plant — don’t put it out until nighttime temperatures are reliably above 50 degrees Fahrenheit. Genovese basil is the classic. Cilantro bolts fast in heat, so plant it early and expect it to go to seed by summer. When it does, let it — the seeds are coriander, which is also useful.
Cucumbers. Another high-producer that’s satisfying for beginners. They need something to climb — a simple trellis made from two stakes and string works fine. One or two plants produce plenty for fresh eating and enough extra for a batch of pickles. Pick them when they’re 6-8 inches long; if they turn yellow, they’re overripe and bitter.
Spacing and Layout
In a 4x8 bed, space matters. Don’t plant everything in neat rows with 3 feet between them like a commercial farm — that’s a waste of your limited space. Use intensive spacing (sometimes called square foot gardening):
- Tomatoes: 18-24 inches apart (2-3 plants per 4x8 bed, along the north side so they don’t shade everything else)
- Zucchini: 24-36 inches (1 plant in a 4x8 bed is plenty — yes, really)
- Lettuce: 6-8 inches apart (tuck these into shaded spots between taller plants)
- Bush beans: 4-6 inches apart in a block
- Cucumbers: 12 inches apart along a trellis on one end
- Basil: 12 inches apart (interplant with tomatoes — they’re good companions)
Put the tallest plants on the north side of the bed so they don’t cast shade over everything else. Trellised plants go on the ends. Low-growing crops fill in the remaining space.
Watering: The Most Common Mistake
New gardeners either water too little or, more commonly, water too much but too shallowly.
A light daily sprinkle wets the top inch of soil and encourages roots to stay shallow, making plants more vulnerable to drought stress. Instead, water deeply — soak the soil to a depth of 6-8 inches — and then let the top inch dry out before watering again. For most gardens in most climates, that means watering deeply every 2-4 days rather than lightly every day.
How to tell when to water: Stick your finger 2 inches into the soil. If it’s dry, water. If it’s moist, wait. This is more reliable than any schedule or gadget.
Soaker hoses and drip irrigation are worthwhile even in a single bed. A 50-foot soaker hose costs $10-$15 and delivers water directly to the soil surface without wetting the foliage (wet foliage promotes fungal diseases). Snake it through your bed, connect it to a hose, and run it for 20-30 minutes. A battery-powered hose timer ($25-$35) automates the process — set it and forget it.
Mulch is your best friend. Two to three inches of straw, shredded leaves, or wood chips on the soil surface between plants reduces watering needs by 25-50%, suppresses weeds, and keeps soil temperatures stable. Don’t skip mulching. A bale of straw costs $8-$12 at most garden centres and covers a 4x8 bed with plenty to spare.
Morning watering is better than evening watering. Plants go into night with dry foliage, which reduces disease pressure. If you can only water in the evening, use a soaker hose or drip line rather than a sprinkler.
Companion Planting: Keep It Simple
There are entire books written about companion planting. For your first garden, you need to know three things.
Tomatoes and basil are genuine companions. Basil may help repel certain tomato pests (the evidence is anecdotal but widely reported), and they have similar water and sun requirements. At minimum, they make efficient use of space together.
Beans and cucumbers grow well together. Beans fix nitrogen that cucumbers appreciate, and they don’t compete for the same space if the cucumbers are trellised.
Don’t plant tomatoes next to brassicas (cabbage, broccoli, kale). They’re not going to die, but they compete for the same nutrients and can stunt each other. This mostly matters in tight spaces — in a single 4x8 bed, just give them opposite ends.
That’s it for year one. Don’t go down the companion planting rabbit hole before you’ve learned how to water consistently.
What You’ll Actually Harvest (Realistic Expectations)
Seed catalogues and gardening Instagram accounts will show you baskets overflowing with perfect produce. Here’s what a well-maintained 4x8 raised bed actually produces in a season:
- 2-3 tomato plants: 20-50 pounds of tomatoes
- 1 zucchini plant: 15-25 pounds (I told you — just one)
- Lettuce succession plantings: salad for two people 2-3 times a week for 3-4 months
- A block of bush beans: 5-10 pounds over a few pickings
- 2 cucumber plants: 15-25 cucumbers
- Basil: enough for weekly caprese salads and a batch or two of pesto
Is this going to replace your grocery bill? No. Will it noticeably reduce your summer produce spending and taste dramatically better than anything from the store? Absolutely. The first tomato you pick warm from the vine will ruin store-bought tomatoes for you permanently.
Some things will underperform. Maybe your tomatoes get blossom end rot (calcium issue, usually caused by inconsistent watering). Maybe the squash vine borers get your zucchini in August. That’s gardening. Write down what worked and what didn’t, and adjust next year.
Tools You Actually Need
Garden tool marketing is almost as bad as kitchen gadget marketing. Here’s what you actually need for a single raised bed:
- Hand trowel ($8-$15). The Wilcox All-Pro 14-inch ($15) is the one you’ll see in professional gardeners’ toolboxes. It’s heavy-gauge stainless steel and will outlast your grandchildren. The generic hardware store trowels bend within a season.
- Hand pruners ($15-$30). Felco 2 ($55) is the professional standard, but the Fiskars Bypass Pruner ($15) is excellent for beginners and holds an edge well.
- Garden hose and nozzle ($25-$50). You already have one. If you don’t, buy one.
- Soaker hose or drip kit ($10-$25). Already discussed.
- Hose timer ($25-$35). Optional but worth it. The Orbit single-outlet timer ($25) is reliable and simple.
- Soil thermometer ($10). Tells you when the soil is warm enough to plant. Not strictly necessary — you can look up last frost dates — but it takes the guesswork out.
That’s the list. You don’t need a rototiller, a broadfork, a soil pH meter (the extension office test is cheaper and more accurate), specialised fertilisers, or a greenhouse. You might want those things eventually, but not in year one.
Month-by-Month for Your First Season
6-8 weeks before last frost (early to mid spring): Build or buy your raised bed. Fill it with soil. Order seeds or plan a trip to the garden centre.
After last frost: Plant tomato and pepper transplants, direct-sow bush beans and cucumber seeds, plant basil transplants. Start lettuce from seed (it can handle light frost, so you can start this a few weeks earlier).
Early summer: Mulch everything. Set up your watering system. Side-dress with compost or an organic granular fertiliser (Espoma Garden-Tone, $15) around tomato plants. Start succession-sowing lettuce every two weeks.
Mid-summer: Harvest zucchini, beans, cucumbers, and lettuce regularly. Pick zucchini when they’re 6-8 inches — letting them grow to baseball bat size reduces flavour and slows production. Stake or cage tomatoes as they grow. Remove suckers (the shoots that grow in the V between the main stem and branches) on indeterminate tomato varieties to focus energy on fruit production.
Late summer/early fall: Peak tomato harvest. Pull spent bean and lettuce plants. Plant a fall round of lettuce and greens if your climate allows. Start thinking about what you’d do differently next year.
After first frost: Pull remaining plants, add 2 inches of compost to the bed, cover with mulch or a cover crop, and start dreaming about next season.
Connecting It to the Rest of Your Home
If you’ve set up automated watering with a smart timer, you’re already partway into home automation territory. Smart hose timers from Rachio and Orbit connect to Wi-Fi and adjust watering based on local weather data — skipping a cycle when rain is forecast. If you’re building out other parts of your home with connected devices, check out our smart home guide for the bigger picture.
And if you’ve been putting off basic home maintenance projects, the confidence you build finishing a garden translates directly to other work. A good next step after your first garden season is tackling a room painting project — similar “prep matters more than technique” energy, similar weekend timeline.
Frequently Asked Questions
How much sun does a vegetable garden need?
Six to eight hours of direct sunlight per day. This is the non-negotiable requirement. Leafy greens (lettuce, spinach, kale) can manage with 4-5 hours, but fruiting crops — tomatoes, peppers, cucumbers, squash — need the full 6-8. Before you build a bed, observe your yard throughout the day and map where the sun hits. The spot that gets afternoon sun in April might be shaded by a tree in full leaf by June.
Should I start from seeds or buy transplants?
For your first year, buy transplants for tomatoes, peppers, and herbs. Start from seed for beans, cucumbers, lettuce, and squash — these are direct-sow crops that grow quickly and don’t transplant well anyway. Starting tomatoes and peppers from seed indoors requires grow lights, seed-starting mix, and 6-8 weeks of lead time. It’s a rewarding skill to develop, but it’s an additional layer of complexity you don’t need right now.
What about pests?
Your first year will probably be light on pest problems because the garden is new. As you build soil biology and your garden matures, pests find you. The best defence is healthy soil, healthy plants, and biodiversity. Interplant flowers like marigolds and zinnias to attract beneficial insects. Hand-pick large pests like hornworms and squash bugs. Use row cover (a lightweight fabric draped over plants) to prevent egg-laying by moths and beetles. Avoid broad-spectrum pesticides — they kill the beneficial insects that eat the pests.
Do I need to fertilise?
If you started with good soil and top-dress with compost annually, you may not need additional fertiliser, especially in year one. Tomatoes and peppers are heavy feeders and benefit from a side-dressing of organic fertiliser (like Espoma Tomato-Tone, $12) once they start setting fruit. Beans don’t need added nitrogen — they make their own. Lettuce and greens benefit from a light compost top-dressing mid-season. If your plants are pale green or yellowing, that’s usually a nitrogen deficiency — a dose of fish emulsion ($12/quart) provides a quick boost.
Can I garden in containers if I don’t have yard space?
Absolutely. A 5-gallon fabric pot ($3-$5 each) on a sunny balcony or patio grows a tomato plant just fine. Herbs thrive in containers. Lettuce grows well in window boxes. The key differences: containers dry out much faster than raised beds (you may need to water daily in summer), and you’ll need to fertilise more frequently since the limited soil volume has fewer nutrients to draw from. A self-watering container like the Earthbox ($40) takes the guesswork out of watering and is excellent for a balcony garden. If you’re tight on space but want to grow food, containers are a perfectly legitimate way to do it.